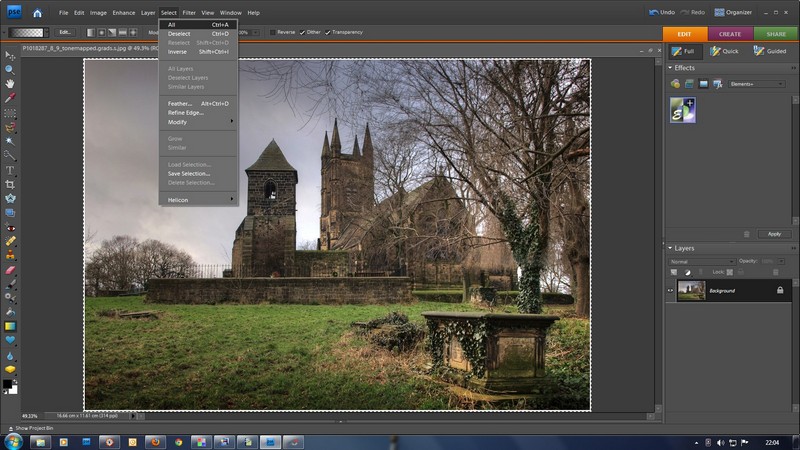
A quick tutorial for putting your photo into an opaque frame. This has been done in Photoshop Elements 7 so you will have to experimet a bit if you're using different software.
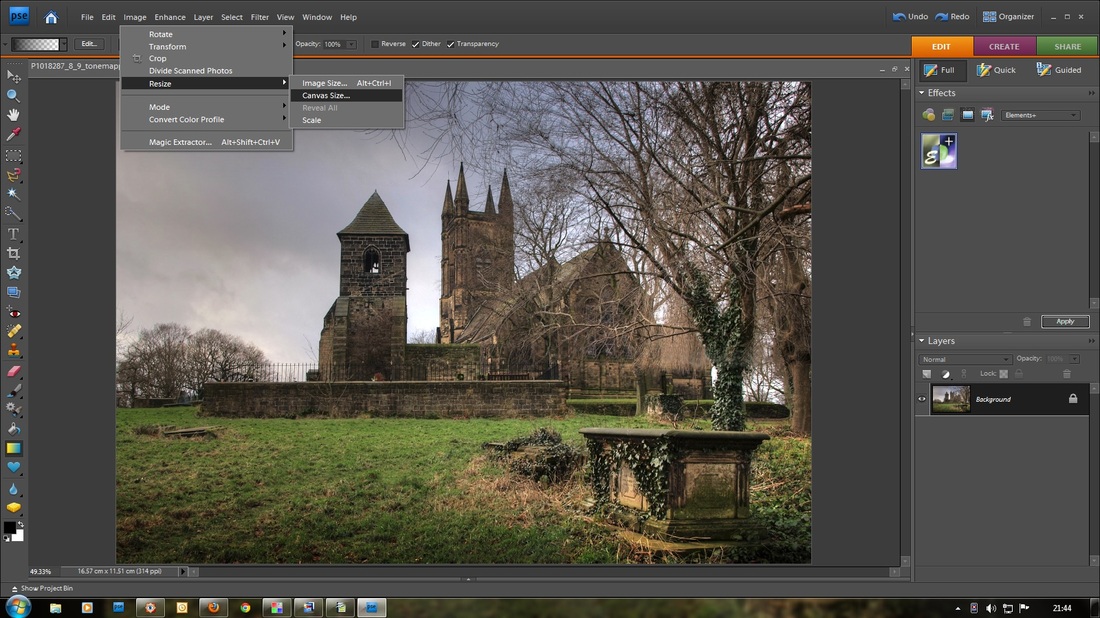
Step 1 having loaded your picture go to "Image > Re-size > Re-size Canvas (not image).
In the pop-up window change the width measurement to mm (the height measurement should automatically change to match - if not, do it manually)
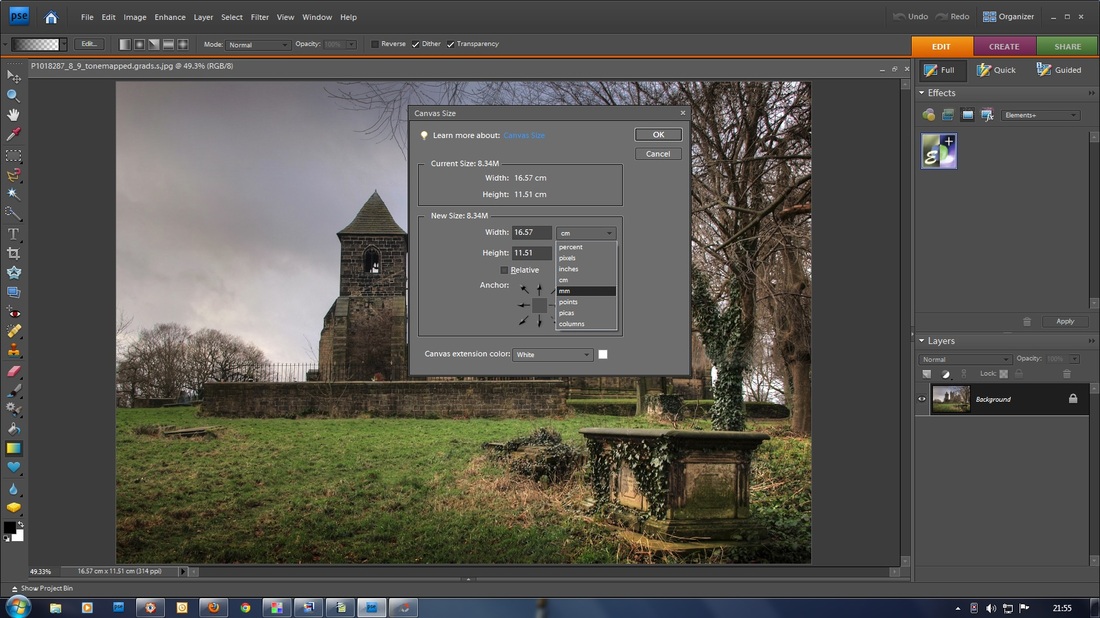
Now highlight the width measurement and increase it by one or two mm (your choice and the result will depend on the original size of your image)

You will have to do the same with the height, this doesn't happen automatically.
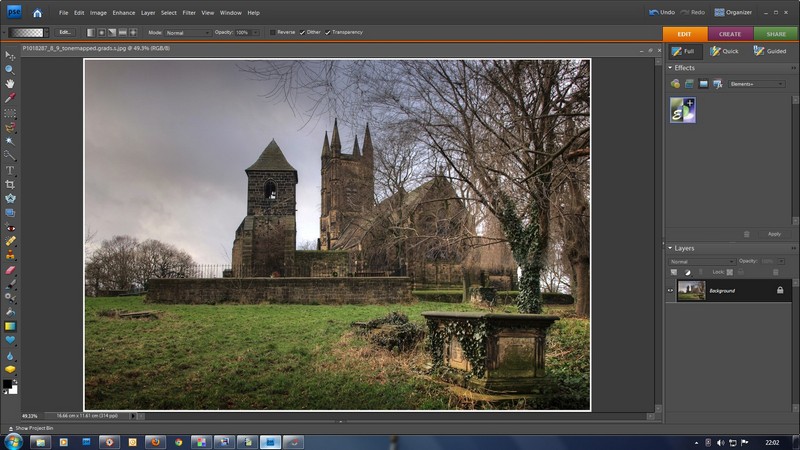
This should give your image a thin white border. (note: If you want a black border that is also possible - just change the colour selection in the panel)
This should give your image a thin white border. (note: If you want a black border that is also possible - just change the colour selection in the panel)
go to the menu bar and "Select All" > then COPY image to clipboard.
Go to Image > Resize > Image Size
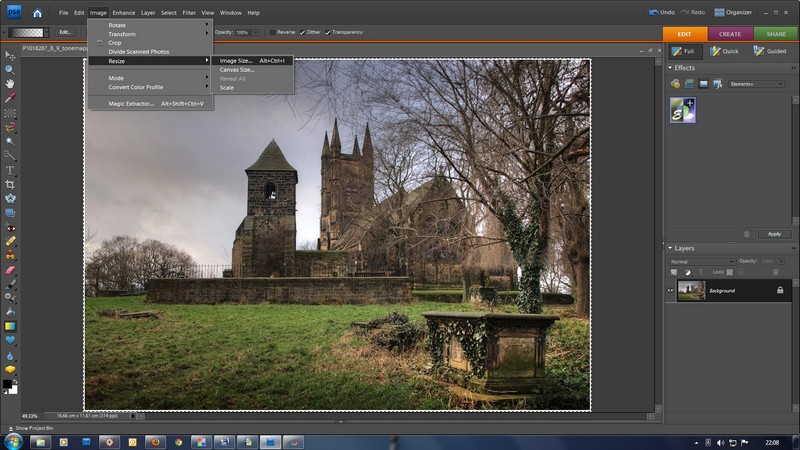
You will have to judge how much to increase the size as it depens on the size of the image you're working with. Try about 25% (if your image is 16cms width increase to 21cms) this is trial and error (and practice!)
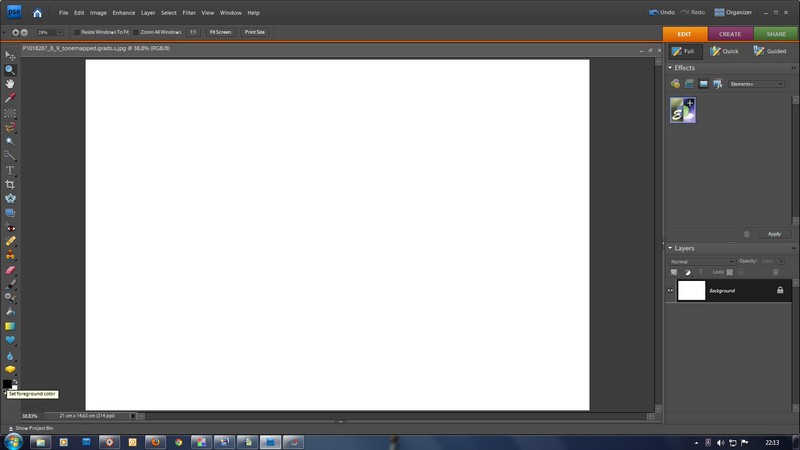
Then "select all" and >edit >and press the delete key. You should be left with a blank white canvas.
Then "select all" and >edit >and press the delete key. You should be left with a blank white canvas.
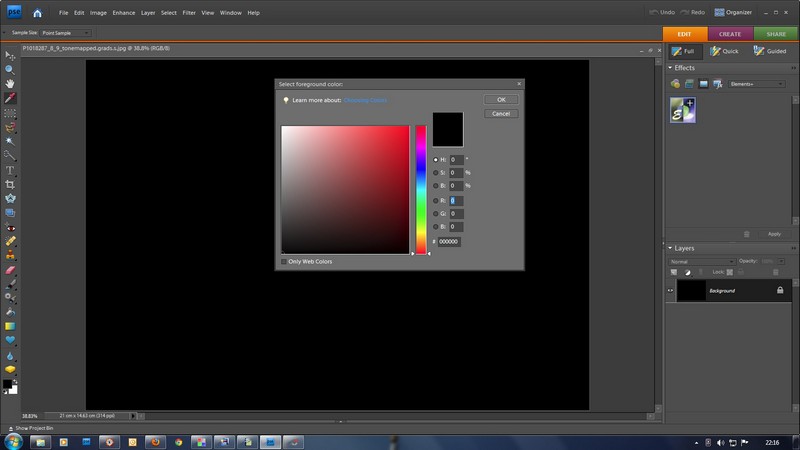
Go to the colour-picker and ensure foreground colour is set to black. Then go to the paint-bucket symbol and move it into the white space - which should fill with black.
Note: If you want a frame of any solid colour you can select it here (click on the foreground-colour and it will bring up the colour-picker window) and fill the canvas, but to keep it simple I'm staying with black.
Now the fun bit. Select > Paste and your image appears back on the canvas.

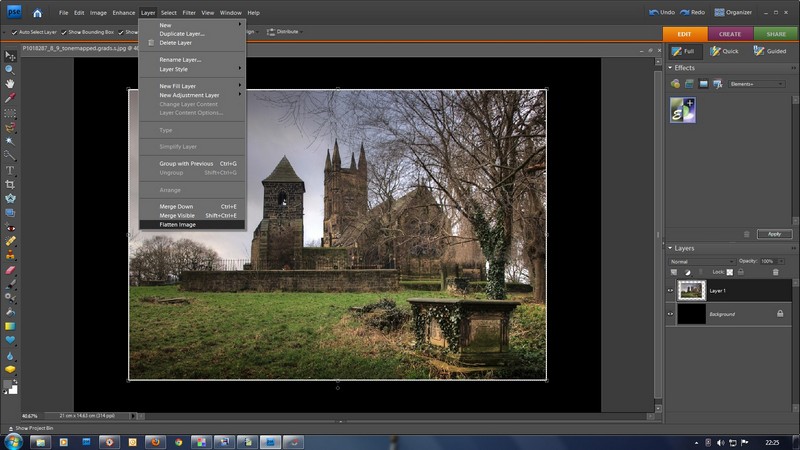
Now in Photoshop, you have created two layers to your picture, so go to the menu-bar, select Layers > Flatten Image and this will merge both layers into one.
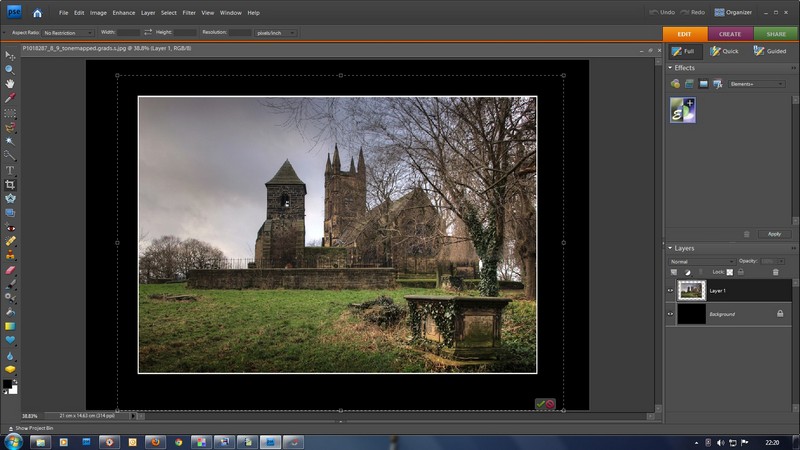
Now to crop the frame into its final configuration. I do the next step by eye so be careful and use your best judgement as to how to crop the frame. If I am going to use a title, I leave the bottom of the frame deeper than the sides and top. Select the Crop tool and adjust it so that it looks in proportion.
Sometimes I add text, using the text tool. I adjust the font, size of text and colour (I rarely use pure white, you want the text to add information but not to distract the eye from the picture)
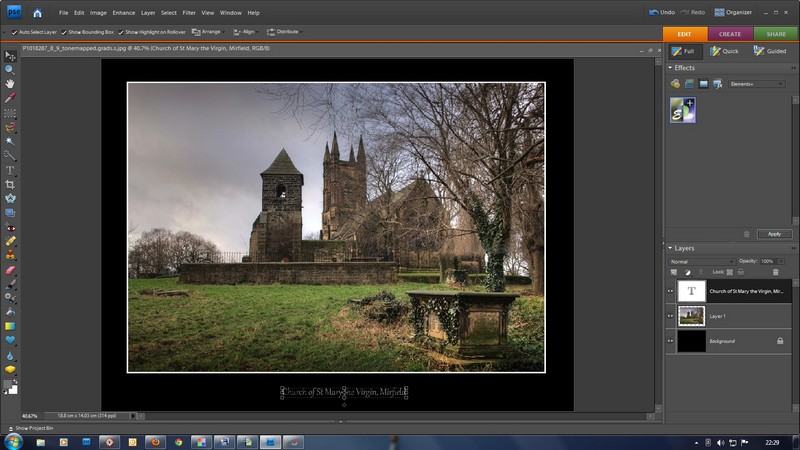
adding text creates another layer, so go to the menu-bar again > Layers > Flatten Image.
THAT'S IT - you're done!